Editor’s Note: The Madawaska Valley Gardening Club is encouraging everyone in the Valley to grow their own vegetables this season. To help you out, we’re giving you a series of articles on how to get started. And as a bonus, if you submit any gardening questions in the Comments section below or call them in to MooseFM at 613.756.1881. MV Gardening Club members will answer them online or on-air. So step out onto your porch and read on …
Spring has sprung!
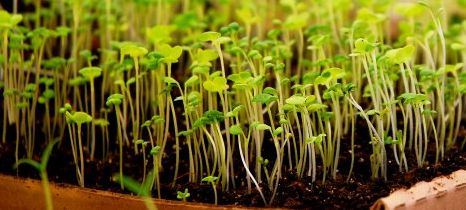
All your wonderfully labeled little pots (or store-bought transplants — that’s not cheating!) are overflowing with miniature green bounty. It’s time to move them out of the house and into your garden. Before we get there, we need to prepare a few things to ensure maximum success.
Your germinated seeds are a source of wonder and inspiration, you can’t wait to get them into the ground. But wait! There are a few items to plan for first that will make all the difference.
Check the weather
Check weather forecast for the last typical frost date in your area. Usually this is the last day of May, but check first; that 4” of snow just before Mother’s Day was a shock for me! You’ll need about a week or more to prepare for that date.
Get the seedlings ready
If the seedlings are not already in individual pots (maybe you have started them in a tray) then now is the time to move them. Consider disinfecting the pots with a bit of chlorinated water. This gets rid of any nasties that may be dormant. You may even drop your tools too into the same water.
Rinse well!
Take gentle care of roots when moving to pots. Handle them by leaves and not the delicate stem. If tomatoes are leggy, bury a bit more stem; tomatoes respond well to this trick as their stem will produce roots. Try to do this at least a week ahead so that they recover before going into garden and to allow some time outside in the pot to harden up.
Hardening off
This is a critical step to success! Seedlings need to adjust before moving to the garden environment. To harden up the seedlings, consider taking them outside for an hour or two on warm days in the week ahead of moving them into the garden. Place the pots in dappled light and protect from wind. Watch carefully so that they do not dry out, moving them in to sunnier and sunnier locations each day. This will harden the plants and make their moving day into the garden much easier.
In the meantime prepare the garden
While the plants are hardening, it will be a good time to prepare the garden and check out the watering system.
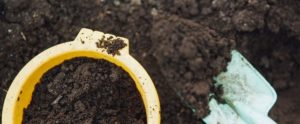
Get the garden soil ready by clearing out any weeds or debris and make improvements to the soil. And add fresh soil if needed that will aid water retention. This is the perfect time to add rotted compost, worm castings, and any ameliorations that improve the soil and water retention. Dig it in down to 10 or 12 inches. The plants will love you for this as their roots reach down into that goodness and the aeration will mitigate any soil compaction that took place over winter.
Get your watering system ready. In our garden we have both well water and lake water, but lake water is the preference. It is not nearly as cold as well water so it keeps any possible shock down. Check hoses, nozzles, make sure the water is turned on to the outside faucets. Water cans ready!
Moving Day!
Pick a warm overcast day to transplant, say, starting in morning. Ensure the ground has warmed up.
Prepare a hole suitable to the seedling. Carefully remove the plant from the pot by squeezing the pot only slightly to loosen the soil along the sides and pushing gently from the bottom to release the plant. Every effort should be given to maintain the root ball intact and as undisturbed as possible. Slip it into the prepared hole and fill the remaining space with the soil. Once firmly in place water well, taking care not to flush away the soil.
Transplanting is a delicate process
Once in, protect if the weather turns chilly; e.g. cover in horticultural fabric or a cardboard box. Keep an eye out for transplant shock such as wilting or yellowing of leaves. This may occur if the delicate roots or stem are damaged in the transplanting. If the roots are damaged, the plant will lose nutrients and go into shock.
And keep notes on when you started to germinate and when you transplanted, it will help you in the following years!
Stay tuned for a future article with more details on maintenance during the growing season. If you have any gardening questions, don’t forget that you can call them in to MooseFM at 613.756.1881 or just post them in the Comments section below; our horticultural members will be most happy to answer them online.
Now just sit back and enjoy the miracles of nature growing your food for you!
(And if you find you have a bumper crop, then consider sharing that additional bounty with the MV Food Bank 😀